filebeat 自定义nginx日志格式并写入ES:
(1)修改nginx的配置文件
vim /etc/nginx/nginx.conf...
log_format baimei_nginx_json '{"@timestamp":"$time_iso8601",'
'"host":"$server_addr",'
'"clientip":"$remote_addr",'
'"SendBytes":$body_bytes_sent,'
'"responsetime":$request_time,'
'"upstreamtime":"$upstream_response_time",'
'"upstreamhost":"$upstream_addr",'
'"http_host":"$host",'
'"uri":"$uri",'
'"domain":"$host",'
'"xff":"$http_x_forwarded_for",'
'"referer":"$http_referer",'
'"tcp_xff":"$proxy_protocol_addr",'
'"http_user_agent":"$http_user_agent",'
'"status":"$status"}';
具体参考: https://www.baimeidashu.com/8057.html
2.检查nginx的语法
[root@elk101 ~]# nginx -t
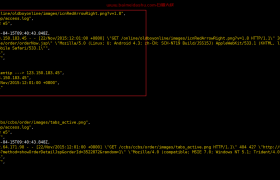
[root@elk101 ~]# systemctl reload nginx3.访问nginx(访问后,修改公网IP地址即可,clientip字段)
http://10.0.0.101/
4.编写配置文件
cat config/01-nginx-to-es.yaml
filebeat.inputs:
- type: log
  paths: ["/var/log/nginx/access.log"]
  processors:
  - decode_json_fields:
      fields: ["message"]
      target: ""

#output.console:
#  pretty: true

output.elasticsearch:
  hosts:
  - "http://10.0.0.101:19200"
  - "http://10.0.0.102:19200"
  - "http://10.0.0.103:19200"
  index: "baimei-filebeat-custom-nginx-access-%{+yyyy.MM.dd}"

setup.ilm.enabled: false
setup.template.name: "baimei-filebeat-custom-nginx"
setup.template.pattern: "baimei-filebeat-custom-nginx*"
setup.template.overwrite: true
setup.template.settings:
  index.number_of_shards: 3
  index.number_of_replicas: 0
5.启动filebeat实例
[root@elk101 ~]# filebeat -e -c config/01-nginx-to-es.yaml
欢迎来撩 : 汇总all