为了达到一个具有互动效果的网站,我们在首页增加一个用户登录和注册的链接,当点击这个登录链接时就弹出登录页面,输入姓名和密码,进行登录操作。通常情况下使用表单来实现用户信息的提交,同时当登录成功后,使用session会话技术保存住用户名信息。
首页效果如图:
<!DOCTYPE html>
<html lang="en">
<head>
<meta charset="UTF-8">
<title>welcome to 2020</title>
<style> .rr{float:left;width:50%;}</style>
</head>
<body>
<div style="width:600px;height:30px">
<div class="rr"> welcome to my webpage </div>
<div class="rr">
{% if data != '' %} #如果存在data变量的值,就显示用户姓名,以及注销链接
<a href="#">{{ data}}</a>
<a href="#">注销</a>
{% else %} #否则就显示登录与注册链接
<a href="#">登陆</a>
<a href="#">注册</a>
{% endif %}
</div>
<div style="clear:both;"></div>
</div>
<img src="{{ url_for('static',filename='img/main.jpg')}}" alt="">
<hr>
<ul>
<li><a href="/news">查看新闻</a></li>
<li><a href="/product">查看产品</a></li>
</ul>
</body>
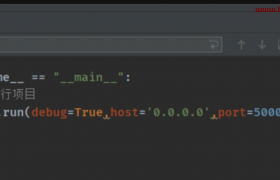
</html>当点击登录链接时,路由指向main.py中的login,该函数直接跳转到login.html页面里。在main.py中这部分代码如下:
@app.route('/login')
def loginpage():
    return render_template("login.html")
在login.html里设计一个表单输入,注意form的action指向路由:
<!DOCTYPE html>
<html lang="en">
<head>
    <meta charset="UTF-8">
    <title>userlogin</title>
</head>
<body>
<center>
    <h3>用户登录页面</h3>
    <div>
        <form action="/loginProcess" method="post">
        用户名: <input type="text" name="nm"><br>
        用户密码: <input type="password" name="pwd"> <br>
        <input type="submit" name="submit" value="登录">
        </form>
    </div>
</center>
</body>
</html>
data=request.form     #data为一个接收表单的数组对象
或者 name=request.form['nm']   #接收到用户名文本框的输入并赋值给name变量
此时loginProcess路由代码如下:
@app.route('/loginProcess',methods=['POST','GET'])
def loginProcesspage():
    if request.method=='POST':
        nm=request.form['nm']     #获取姓名文本框的输入值
        pwd=request.form['pwd']   #获取密码框的输入值
        if nm=='cao' and pwd=='123':
            return render_template("index.html",data=nm)   #使用跳转html页面路由
        else:
            return 'the username or userpwd does not match!'
这里的当输入值满足条件时,使用了render_template来进行页面渲染,实际上是不合适的。不过为了说明表单输入的处理方式,我们先这样运行,如此就基本实现了表单输入的接收。
运行过程中当在首页点击登录时,跳转到login函数渲染的login.html页面,在表单中输入对应内容后,点击提交就来到服务器文件中的loginProcess装饰器路径,在对应的loginProcesspage函数中,使用request.form来接收表单的输入。
后面的跳转先前采用的render_template是不合适的,如果输入的正确时运行后,网页上的url仍然是http://127.0.0.1/loginProcess,而不是首页url,说明render_templates来实现url跳转是不合适的。这里调整一下,选用redirect重定向方式,也就是将render_template修改为:
return redirect(url_for('index'))
还是使用到url_for方法,寻找到对应的路由处理函数。不过不像rendertemplate可以传递参数,redirect默认参数里没有传值功能,因此如这种用户注册,需要使用一下会话session缓存技术。也就是将正确的用户名保存到session数组变量中。使用的时候先从flask库中导入session模块,同时为了保证安全,还需要给定一个app.secret_key:
app.secret_key='any random string' #这里我们直接给定一个密钥
然后在刚才登录loginProcess代码中增加一个session会话存储功能:
@app.route('/loginProcess',methods=['POST','GET'])
def loginProcesspage():
    if request.method=='POST':
        nm=request.form['nm']
        pwd=request.form['pwd']
        if nm=='cao' and pwd=='123':
            session['username']=nm             #使用session存储方式,session默认为数组,给定key和value即可
            return redirect(url_for('index'))  #重定向跳转到首页
        else:
            return 'the username or userpwd does not match!'
接下来在首页index.html页面中修改一下:
这样就完整实现了用户的登录,当然这里的用户目前只限定了一个人名cao。如下为用户登录界面以及登录后首页的效果。
2-flask开发简单网站-网页跳转: :连接
3- flask传递参数(url 携带参数) : 连接
4-flask实现表单数据传输 : 连接
欢迎来撩 : 汇总all